Difference between revisions of "Projector"
(saved draft) |
(→Media) |
||
| (19 intermediate revisions by 8 users not shown) | |||
| Line 1: | Line 1: | ||
| − | + | {{SimpleItembox|Mod:Vanilla/CubeBlock/LargeProjector | |
| − | {{ | + | |Size|Mass|Integrity|BuildTimeSeconds|RequiredPowerInput#W|ResourceSinkGroup|IsAirTight|PCU |
| − | | | + | }}{{SimpleItembox|Mod:Vanilla/CubeBlock/SmallProjector |
| − | | | + | |Size|Mass|Integrity|BuildTimeSeconds|RequiredPowerInput#W|ResourceSinkGroup|IsAirTight|PCU |
| − | | | + | }}{{CategorizeComponents|Mod:Vanilla/CubeBlock/LargeProjector}} |
| − | | | ||
| − | | | ||
| − | | | ||
| − | | | ||
| − | | | ||
| − | |||
| − | | | ||
| − | |||
| − | |||
| − | |||
| − | |||
| − | | | ||
| − | | | ||
| − | | | ||
| − | | | ||
| − | | | ||
| − | | | ||
| − | | | ||
| − | | | ||
| − | | | ||
| − | |||
| − | |||
| − | |||
| − | |||
| − | |||
| − | |||
| − | |||
| − | |||
| − | |||
| − | |||
| − | |||
| − | |||
| − | |||
| − | |||
| − | |||
| − | |||
| − | |||
| − | |||
| − | | | ||
| − | |||
| − | |||
| − | |||
| − | |||
| − | |||
| − | |||
| − | }} | ||
== Overview == | == Overview == | ||
| Line 55: | Line 9: | ||
== Usage == | == Usage == | ||
| − | Before it can be used the Projector must first be powered, and also the player needs a [[Blueprint]] they can use in order for the block to project it and unlock additional options. Once a blueprint has been selected, the | + | Before it can be used the Projector must first be powered, and also the player needs a [[Blueprint]] they can use in order for the block to project it and unlock additional options. Once a blueprint has been selected, the list of blocks needed to complete it will be displayed in the [[Terminal]]. The model will appear near the block. |
| − | In survival, the player must adjust the position of it | + | In survival, the player must adjust the position of the [[Blueprint]] so it is in contact with the projector's [[Grid]]. When welding, the projected block in contact with the projector's grid will be welded first provided both of them can be welded together, then others adjacent to it. The same principle applies to the blocks after that until the model is completely built. This method can also be used to repair an already built ship. Simply [[Blueprint]] the ship (before it was damaged), then use the projector and line it up with your ship so it overlaps. If there are any damaged, or missing blocks, the projector will display it and allow you to weld that area. |
In [[Scenario_editor|Scenario]]s gamemode the ''<insert block instant option here>'' allows the projector (when triggered) to instantly spawn the blueprint instead of it being constructed piece by piece. | In [[Scenario_editor|Scenario]]s gamemode the ''<insert block instant option here>'' allows the projector (when triggered) to instantly spawn the blueprint instead of it being constructed piece by piece. | ||
| Line 67: | Line 21: | ||
=== Terminal === | === Terminal === | ||
<will fill in> | <will fill in> | ||
| − | |||
| − | |||
| − | |||
== Media == | == Media == | ||
| − | + | [[File:Projector_Proj01.jpg|400px|none]] | |
| + | [[File:Projector_1.199.025.png|400px|none]] | ||
== Tips == | == Tips == | ||
| − | + | * To build a small-grid blueprint while working from a large grid, or vice versa, [[Landing Gear]] blocks make a good workaround. Build a Landing Gear of the same size as the blueprint, oriented so that it is in range to latch to a handy surface of the existing grid. Then add to it a power source and the Projector. You may also need to add a [[Control Panel]] or an [[Antenna]], since Landing Gear and Projectors do not provide terminal access by themselves. Now the Landing Gear can be commanded to lock onto the old grid so that the grid under construction can remain attached to it without needing to be ''part'' of it. | |
| + | * Building from a projector can be tricky as smaller blocks can be overlooked while welding. One idea would be to tick the "show only buildable" box and weld the model layer after layer. | ||
| + | * For more effective construction in [[Survival Mode]] and if one does not want to use [[Creative Mode]] to make full Blueprints of ships, it is possible to make Blueprints of larger walls and segments of ships to construct ships in Survival more easily using a Projector to project the blocks instead of manually placing them, which can be tedious to say the least on a larger vessel, and then weld it from the projection. Control the projector from something like a [[Control Station]] or a few [[Button Panel]]s to make it easier to see how you align the projection. As soon as welded the blocks are part of the grid. For easier management use the Keep Projection setting and realign the projection for continuous construction. | ||
| + | *For the above construction technique it does increase efficiency if one player controls the projection from a work station and another player is piloting a welder ship. Or it is possible to use a [[Remote Control]] to control the projector. | ||
== Known Issues == | == Known Issues == | ||
| − | * | + | * Labels for Yaw and Pitch are swapped. |
== Update History == | == Update History == | ||
| Line 87: | Line 42: | ||
</div> | </div> | ||
| + | [[Category:Functional Blocks]] | ||
Latest revision as of 19:19, 2 September 2021
526,400,000 mg
0.526 t
0.2 kW
130,400,000 mg
0.13 t
0.1 kW
Contents
Overview
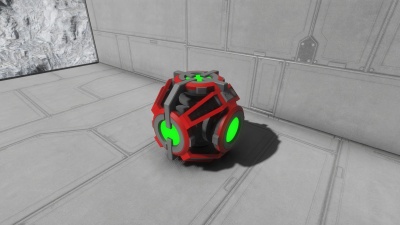
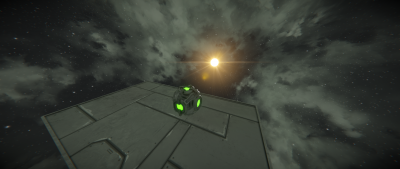
The Projector is a block capable of displaying full sized Blueprints in a projected image around it. It is available for both large ships, stations, and small ships. The projection can either be instantly spawned in a Scenario gamemode, or welded together in survival.
Usage
Before it can be used the Projector must first be powered, and also the player needs a Blueprint they can use in order for the block to project it and unlock additional options. Once a blueprint has been selected, the list of blocks needed to complete it will be displayed in the Terminal. The model will appear near the block.
In survival, the player must adjust the position of the Blueprint so it is in contact with the projector's Grid. When welding, the projected block in contact with the projector's grid will be welded first provided both of them can be welded together, then others adjacent to it. The same principle applies to the blocks after that until the model is completely built. This method can also be used to repair an already built ship. Simply Blueprint the ship (before it was damaged), then use the projector and line it up with your ship so it overlaps. If there are any damaged, or missing blocks, the projector will display it and allow you to weld that area.
In Scenarios gamemode the <insert block instant option here> allows the projector (when triggered) to instantly spawn the blueprint instead of it being constructed piece by piece.
- For more information on how to use the projector block, see the Projector Guide
Limitations
The projector can only display a blueprint appropriate to the grid it is on. In other words, if your projector is built on a large ship/station grid, you can only display/construct blueprints that are also either made of large ship/station blocks. The same rule applies to a small ship projector as it cannot display ships made from large ship blocks.
Terminal
<will fill in>
Media
Tips
- To build a small-grid blueprint while working from a large grid, or vice versa, Landing Gear blocks make a good workaround. Build a Landing Gear of the same size as the blueprint, oriented so that it is in range to latch to a handy surface of the existing grid. Then add to it a power source and the Projector. You may also need to add a Control Panel or an Antenna, since Landing Gear and Projectors do not provide terminal access by themselves. Now the Landing Gear can be commanded to lock onto the old grid so that the grid under construction can remain attached to it without needing to be part of it.
- Building from a projector can be tricky as smaller blocks can be overlooked while welding. One idea would be to tick the "show only buildable" box and weld the model layer after layer.
- For more effective construction in Survival Mode and if one does not want to use Creative Mode to make full Blueprints of ships, it is possible to make Blueprints of larger walls and segments of ships to construct ships in Survival more easily using a Projector to project the blocks instead of manually placing them, which can be tedious to say the least on a larger vessel, and then weld it from the projection. Control the projector from something like a Control Station or a few Button Panels to make it easier to see how you align the projection. As soon as welded the blocks are part of the grid. For easier management use the Keep Projection setting and realign the projection for continuous construction.
- For the above construction technique it does increase efficiency if one player controls the projection from a work station and another player is piloting a welder ship. Or it is possible to use a Remote Control to control the projector.
Known Issues
- Labels for Yaw and Pitch are swapped.
Update History
| Update 01.058 | Projector block introduced |

