Difference between revisions of "Sensor"
From Space Engineers Wiki
(added some linking) |
(fixed Crafting Materials to Raw Materials) |
||
| Line 98: | Line 98: | ||
|- | |- | ||
!style="text-align:left;" | Detect floating objects | !style="text-align:left;" | Detect floating objects | ||
| − | |The sensor will be able to detect small objects such as [[ | + | |The sensor will be able to detect small objects such as [[Ores]], and/or [[Raw Materials]] if selected |
|- | |- | ||
!style="text-align:left;" | Detect small ships | !style="text-align:left;" | Detect small ships | ||
Revision as of 03:30, 19 October 2014
Mass (kg):
0
Integrity:
0
Build time (seconds):
20
Mass (kg):
0
Integrity:
0
Build time (seconds):
20
Contents
Function
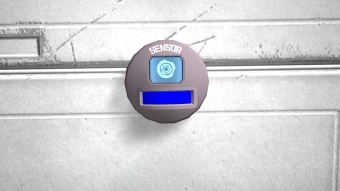
The sensor is a device that is able to detect the movement of players, objects, and other entities. After doing so, it can be assigned actions to take when an object enters/leaves its radius. There are indicator lights on the sensor itself. Meanings to what each light means is specified below:
| Sensor Indicator Light Definitions | ||
|---|---|---|
| Color | Status | Comments |
| Blue | Standby | This is its passive state, when there are no detectable objects in its radius |
| Green | Object Detected | An object it is programmed to detect is within its radius |
| Red | No Power | There is no power being supplied to it, or it is switched off. |
| Control Interface Menu | |
|---|---|
| Options | Comments |
| Toggle block | Turns the device on, or off. |
| Name | You can enter in your own custom name in the text box |
| Show on HUD | If there is an Antenna attached to the same grid, this device will display its position on the players HUD |
| Setup Actions | Set up actions for the device to take when someone enters/leaves detection radius |
| Left extent | The detection range on the left side of the sensor |
| Right extent | The detection range on the right side of the sensor |
| Bottom extent | The detection range on the bottom side of the sensor |
| Top extent | The detection range on the top side of the sensor |
| Back extent | The detection range on the back side of the sensor |
| Front extent | The detection range on the front side of the sensor |
| Detect players | The sensor will be able to detect players if selected |
| Detect floating objects | The sensor will be able to detect small objects such as Ores, and/or Raw Materials if selected |
| Detect small ships | The sensor will be able to detect small ships if selected |
| Detect large ships | The sensor will be able to detect large ships if selected |
| Detect stations | The sensor will be able to detect stations if selected |
Placement
|
| ||||||||||||||||||||||||||||||||||||||||||||||||||||||||||||||||||
Usage
While capable of performing complicated tasks, the sensor is very easy to use. An example of one of its many uses is demonstrated below:
| Example Tutorial | |
|---|---|
|
|


